
Appearance
Installation
Step-by-step procedure to install, activate, and license the Razorpay plugin in AcelleMail.
- Prerequisites: Server meeting Requirements, administrative privileges, relyweb.co license key, and Razorpay API credentials.
1. Upload the plugin
- Download
relyweb-razorpay-vX.Y.Z.zipfrom your relyweb.co client area. - Navigate to Admin → Plugins → Upload Plugin in AcelleMail.
- Upload the archive directly without unzipping.
2. Activate
Locate Razorpay under Admin → Plugins and click Activate. (Gateways remain hidden until an active license is validated).
3. Enter license and credentials
Navigate to Admin → Plugins → Razorpay → Settings, enter the required fields, and click Save Settings:
| Field | What to enter |
|---|---|
| License Key | Your key from relyweb.co |
| API Key ID | Razorpay Key ID (starts with rzp_live_ or rzp_test_) |
| API Key Secret | The matching secret from the Razorpay dashboard |
| Webhook Secret (optional) | From Razorpay Dashboard → Webhooks, used to verify incoming events |
When the license validates, a green Active badge appears.
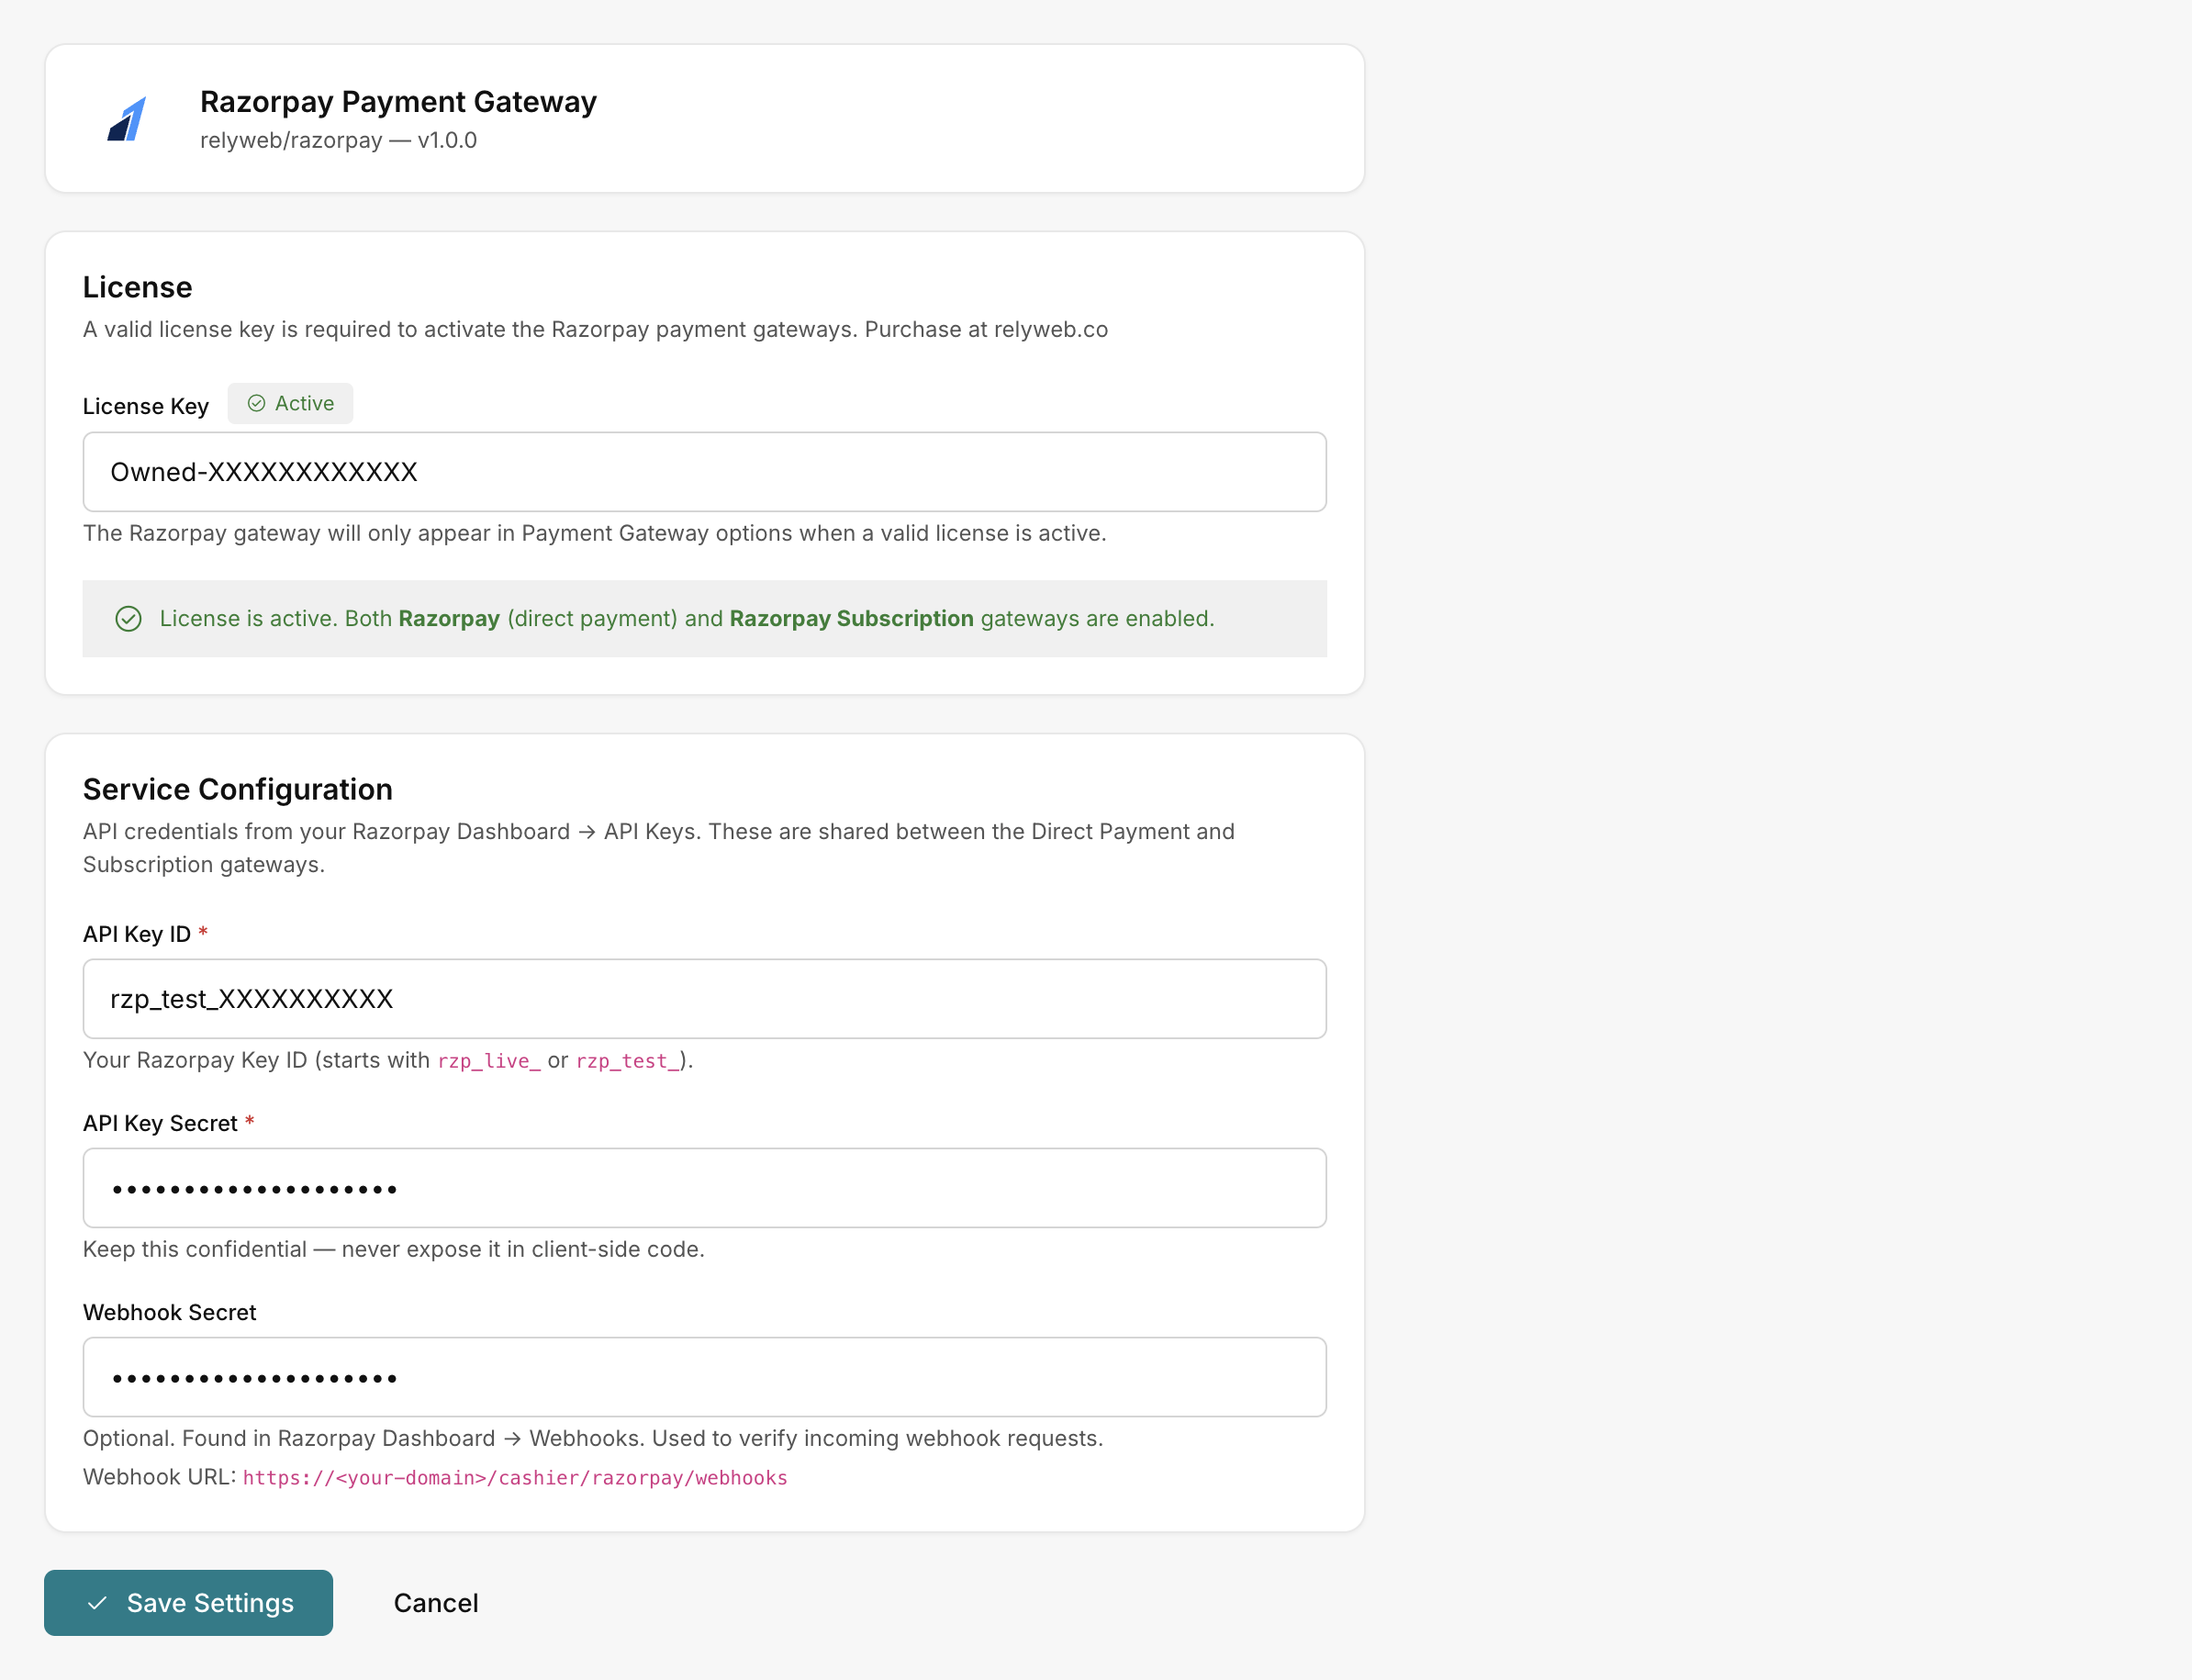 Admin → Plugins → Razorpay → Settings
License gates the gateways
Until the license badge reads Active, neither gateway appears in Payment Gateways. See Licensing.
4. Verify
Saving with an active license automatically provisions both gateways:
- Direct payments: Razorpay is ready immediately for one-time INR checkout.
- Subscription payments: Razorpay Subscription requires plan mapping before it appears on plans.
- Gateway registration: Both gateways appear in Admin → Payment Gateways without manual creation.
Finish the setup
- Configure webhooks so events are received and signature-verified.
- Set up subscriptions to map INR plans and enable recurring billing.